Pages

Saturday, September 17, 2011

My Work Area! - 17 September 2011

Hey there :)

I've been spending more time packing up than really getting to work.

I'm such a hoarder >.< I bought like so many things, but I'm totally not getting down to creating.

So instead of keeping people waiting, I decided to write a post of how I keep my stuff, and I'll kind of turn it into a mini guide to what you need (And don't need :P) for polymer clay/air dry clay crafts etc.

I'm actually planning a further organisation, by replacing all the plastic bags to proper containers. But I need $$ (you'll see why later).

\
My Table, the main area for my clay creations :) I also have an oven beside this table, and I used 2 drawers of my closet for clay materials.


My polymer clay, wrapped in clingwrap. My ADC too :) Not enough clay... Need to either find garies/tinkleart/nex :( Sigh. ANyways, I left my clay for so long, that it became hard so I had to hammer and use baby oil to soften it. Took me at least half an hour :/


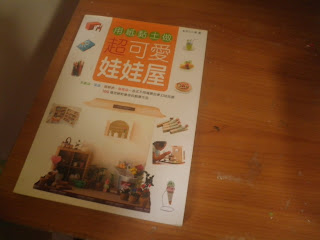
Haha, my miniatures book. Uses adc, but I use it for polymer clay haha. So far all I tried out was the pencils LOL!


This compartment thingy was bought at Giant for around $10? Used to be for keeping at the small stuff, but i've decided to use it as a place to place cabochons! 

But as you can see it's empty. Used them up to make gifts lol (I've been working, but I did'nt post the photos as they included names).

WILL TRY TO FILL THEM UP :)


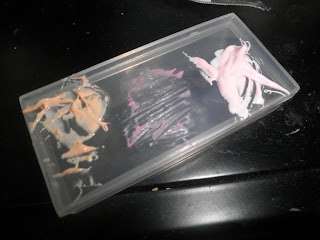
The two thingy is my epoxy. They drove me crazy, and leaked like shit.. even making the whole compartments thingy sticky -.- so this is my solution :)


This case includes canes which i've yet to cut. Can you spot LOL. Have peanut blocks, charsiew cane and the chocolate flakes piece :)


The last container contains toppings. It has all the ready sliced canes in individual ziplocks, containers containing choco rice, choco flakes and one full of mini mini beads. 


The last blue-ish container containers my whipped cream! I'm thinking of selling them so haha pls comment if you're interested XD


Lastly, tons of baby wipes. Later you'll see another pack haha. They're the best, because water does'nt clean polymer clay :) I buy mine for 3.75 for 3 packs. VERY WORTH IT :P Valudollar shop.. See thats why I went crazy buying it heh.


First row of the green drawers.

My molds! Oyumaru Molds I made myself, molds from daiso, molds from hardwares stores and some other ones I buy from craft stores. I also put my cutters here :) the purple one is a playdoh mold :P


Another row specially for satay sticks and toothpicks. I just love these <3


Last row for Tools. Like tweezers, scissors, circle ruler, toothbrush, penknifes and blablablah.


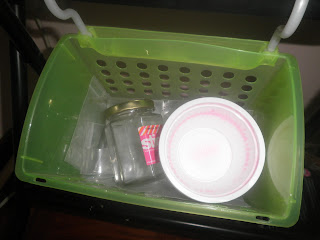
Below the table - I just keep ziplocks which may be used for piping, and some bowls (for mixing?) and a container that's yet unused :)


Below, below the table is a hammer! Hammer old clay muahahah!


First Drawer. NIGHTMARE! I call this the "rarely use" drawer.

Other than stuff I rarely use for clay crafts, i also keep stuff for other crafts.

I'll try to explain zomg. I keep glues, acrylics which I only take out when making the whipped cream. I also have the bi carbonate soda for cakes making. I have a "bowl" of paper clips cause I did'nt know where else to stuff it. The bottle you see is johnson baby oil which container pissed me off so I transferred to this squirt bottle :)

My spray glaze can and my daiso glaze can also be seen :)

the random plastic bags include glitters, stamps, paper cutters, ice cream sticks (I bought like so many packs and never used them. Told ya I'm a hoarder). 

So sorry it's super messy. Just know that I've a lot of stuff bahs :D


The "more used" drawer. 


The squarish box contains my sauces, deco sauce or my liquid clay. Deco sauce mainly for decoden, while the tiny ziplock ones are made from liquid clay.


Clay extruder thingy. Best thing is that its very non-messy :) $2 from daiso must buy lol! Somemore have alot of tips :D


one of the boxes is my oyumaru/moldmaking area. it has molding material (the oyumarus) and the "originals". these are cabochons which I buy and makes molds out of them hehehe :)


My attachments box. Includes magnets, hp straps, strip magnets, bracelet chains, eyepins, ring bases, earring bases and posts :) I buy them from the wholesalers...super cheap hehe.


These are just miniatures I get from madam ang and tinkle art :) dollies, bowls, plates parfait cups. I actually bought them with a plan in mind. Haha! Never got around carrying them out -.-

OKAY! Like I said, I've been working, but I did not post photos cause those were for friends :) 

So, as a conclusion, that's possibly what you can considering buying for your clay craft. I generally don't limit myself to buying from craft stores, its more fun to look out for cutters and all that while doing everyday shopping (they are usually cheaper too!). I get stuff from popular, daiso, tinkle art, garies, mdm angs, random hardware stores, nail art stores. SO MANY! 

But do not hoard, like ME :D

Anyways. Like I said I'm in quite some need of cash to buy stuff from tinkleart, so I thought I could start selling some creations, which kills 2 birds with 1 stone. Firstly I get to earn money, secondly, people get my creations! So I'll be creating another page for my "shop" and slowly updating it, so look out!

That's all, looking to do some rings soon :P


Tuesday, August 30, 2011

Here's how I do my Sweets Deco Whipped Cream


Have you found the perfect formula to whipped cream?

No fuss, No expensive stuff, But yes to texture and quality?

Here's a sharing on how I do mine :)

Not the best, but I think it works fairly well for me :D

First up: Ingredients:


$2 Daiso Clay : I'm LOVING IT REALLY. Gives your final whipped cream the whipped cream look ^_^


The $7 shit I bought. I need to give it a new name. How about Gesso?

Haha you don't need a lot per batch, so it can last me some time :)

This is the special ingredient which will give your whipped cream the steadiness which will help it in sticking to your deco piece super hard-ly :D

It's basically canvas base, so its super hard. It's something like high quality acrylic so I think if you don't have this you can get acrylic, but of course if you go art friend u can always get this. Its $7 for a huge tub so I think its worth it! (Probably the most ex part of this recipe!)

It's slightly different from acrylic, yet around the same :)


The inside~ 


Glue! Acrylic is really strong and once I mixed it with flour and the two just mixed their strongness and it cracked. This time I replace flour with daiso clay and added in some glue to hold them together.

Common Sense BABY!

Haha, basically desperado to use acrylic and refusal to give up on it so I devised this recipe and surprisingly it worked out :D

So you mix mix mix.

mix mix mix.

mix mix mix.

its gonna take some time...

mix mix mix.

mix mix mix.

TA DA!!!


I don't know if you can see it, but I HEART THE TEXTURE >< If you see it in the starbucks photo, it has this imperfect look about this which really gives me the whipped cream feeling ^_^

Okay so if you ask me what amounts? Again I can't tell you. I don't go use cups and measure.

I first throw in whichever amount of daiso clay I want. 

Add a bit of acrylic, add a bit of glue.

What you want to know is:

Too Much Acrylic: MIght Crack! Haven't happened to me but the flour+acrylic thingy just serves as warning lol.

Too much glue: The details won't hold. Happened to me the last time I did this >< But if you don't put this, the clay won't hold and it will just be a musy mess.

So yeap, go easy on the amounts and once u reach a pipable but holdable texture, you've got it ;)

Last but not least, to clarify:

3) The glue I use is white glue so don't freak out if u don't look like you have the same bottle.
2) The Acrylic I use is called Gesso, or canvas base but you might want to try other forms of acrylic.
3) I use daiso clay, but you can probably substitute with any soft clay (not resin clay cause it won't be whipped creamy!)

Tell me if you tried this recipe! I hope it works out for you :)

Will be using this for future deco because it can be glazed and might try out arista soft (it is quite affordable and it has been stocked in tinkleart) but meanwhile I am gonna snatch a few more boxes of daiso clay :)


Monday, August 15, 2011

Mini Starbucks!


Enjoy! 

made up of my deco cream (check out the recipe!) and adc. "Stole" the mini cup from starbucks itself ^_^


Just tons of photos :)


Polymer Clay Whipped and Pipable Cream tips and tutorial

Okay, i know this is not some big secret in polymer clay, but I found myself struggling big time with this because all they tell me (on websites and youtube) is make it and pipe it. 

Nothing else. So I had to like keep experimenting and wasting clay ><

And as you can see in the title, its PIPABLE cream.

Most tutorials tell me to use a tooth pick and put on a puff or pipe onto a puff A.K.A those ugly, no shape, meant to put fruits to cover ones.

The ones I'm talking about in this post is this:


Its those kind u pipe through a small teensie weensie cupcake that is less than 1cm in diameter :)

Super duper useful to pipe on cupcakes, frosted cookies and so on.

Not so sure about piping the shells and all those, but I'll try that out (again no help given from internet) and update XD

First up - Mixing the cream


this one should be known by now. Don't be lazy or cheap, use liquid fimo and mix with clay!

For me I use liquid fimo + fimo soft so I can use water to make the clay soft before adding fimo (works faster!)

And don't expect me to tell you the ratio, work it out yourself!

For me I make one batch, try it out. The batch is white and I keep in a container and whenever I need to pipe stuff, I mix the colours with pastels like this before using :)


Don't expect your whipped cream to be like those orange orange cause the base of it is white. If you want orange orange, u got to make a batch of orange clay + liquid fimo or else no matter how much orange pastels you add, all you gon get is a whitish pastel orange :) 

But for cookies you usually use pastel colours? So I don't bother since it involves liquid fimo which is not cheap btw.

Next on - Preparing the piping bag.

Might sound easy, but hey I struggled with this part too so maybe u might ^_^


Sandwich Bag, or which I call ziplocked bag. Cut out a as shown in photo.


HAHA. this is the part. I used to stupid use a scissor to cut the tip, resulting in big ass tip :( Use a needle for better effect, and if you are using a toothpick, dont poke throughout and just end at where I ended (or u end up with a big hole still -.-). 

This can then ensure the hole you are piping through is neat and consistent!


Fill the bag~


Test this out. looks goooood.

HAHA another photo :)

So I hope you learnt more on how to pipe using liquid polymer clay. its simple but if i had found this on the internet I would be uber happy :D

the main tips I have is:

1) Poke the hole before putting in the cream (from the inside using a tooth pick), it won't hurt :)
2) Use small piping bags, this makes it easier to manipulate and lesser risk of popping piping bag and have all the cream gush out :(
3) Keep practising!
4) Make a white batch and mix colours of individual projects. Minimizes wastage :D
5) Use disposable piping bags. Helps in clean up!

Okay, thats all. Have fun piping, I'll be, cause now I'll addicted to piping stuff.

Cookies anybody?


Saturday, August 13, 2011

BACK!!!!

YAOOOOOO!

Sorry for leaving you guys nothing to read (which ever few followers I have teehee).

Exams are over, and I've reignited my love for Clay Art (I did'nt have much motivation last time :( )

ANYWAYS.

I'm now working on some presents for my friends (that explains the motivation) and here's something I made :)


HAPPY CUPCAKES!


Under no-flash.

Love the cream colours :)

Made after real life ones I made so it adds to the meaning :)

I also tried out a new way to make cupcakes so after modification I guess I'll make a tutorial ^_^

Other than these cupcakes I was ready for the next search for DECO DEN WHIPPED CREAM!

I've had numerous failures, spending $7 on worthless shit, using silicon which is great but gives me respiratory difficulties and of course refusal to buy whipped cream sold at $16 up per tube.

I first went on to youtube and found a tutoral which asked me to use acrylic (THE SHIT I BOUGHT THINKING IT WAS TEXTURE PASTE!!!) and flour. So I mixed the two in glee, happy that I could turn the shit into something useful :D

Verdict? Held the texture, very sturdy, very hard. HOWEVER, it cracked and made me uber sad. It was really good, and the only problem was that it cracked :(

Second try! I was like really despo, so I just took some daiso clay, mixed it with glue AND added some Acrylic (HAHA i just had to use the "shit") 

Tested it out~


Did'nt hold textures that well, but passable. And maybe I added too much white glue :X


looks like this~

Overall I have to say it held in the watermelon slice, and stuck well to the iphone cover, so I think I'll just again modify it and use it as my deco den whipped cream! YAY!!!

YEAP, pretty much my largest achievement ><

Lastly, my second largest achievement would be to finally pipe sensibly!


Haha yes yes yes I piped those Happy Cupcakes with liquid polymer clay and I think I've finally found the texture and tricks lol.

Again I'll have to modify it and get back to you guys.

I surfed the net for crazily long and nothing came up with a good recipe for Whipped Cream, Polymer Clay PIPABLE Cream :(


Sunday, June 26, 2011

Plants + Polymer Clay


My Bonsai! With a touch of polymer clay :)


Say Hi to Rabbit lol! I wanted to make two, (rabbit couple) but when I finished one rabbit it was like midnight so I gave up. ___ .

The Moss is Heart Shaped! And the pebbles are hand rolled haha :D


ROSES! I made mini roses and stuck them onto eye pins. The rest are pebbles which I really like, but my Bonsai Teacher said it looks like a pimple infested mountain :/

Whats a Bonsai? A bonsai/bonjing is a plant which kind of stimulates a mini forest/hill/park/greenery. Like a miniature version! 

Okay, just in case you are wondering why I'm posting my Bonsai. I don't take Bonsai Classes, this is for a sabbatical in school.We were supposed to have a budget to buy ingredients to make our own Bonsai. But the stuff were so hard to find and I could not find pebbles (i only got rocks) so why not make my own? I also made the little swing with wood :) Like I mentioned earlier, this is like a miniature, just au natural! The plant in the pot signifies a tree, and the whole pot will then look like a forest :)

Well if you have a plant, why not use polymer clay to decorate it too? :D